Blog Success Tips

John Chow: Blog Success Tips

Some things just aren’t worth keeping to yourself, like successful blog tips.

And that’s why we’re going to share with you one of the best videos out there about successful blog tips. So sit back for the next thirty-four minutes and watch with us as John Chow presents his blog success tips to the Society of American Travel Writers in Germany.

7 Tips To Consider Before You Build Your List

7 Tips To Consider Before You Build Your List

What’s the key to most things on the Internet? Traffic of course. Now before you start saying that this sounds like another one of those “Chicken vs. Egg Theories” about which comes first “the List or the Traffic”, just realize that you already know the answer. Of course it’s the list. No traffic. Wait, I’m so confused!

Like everything else on the Internet, list building is no different and requires traffic it be successful. But before you go and get tons of traffic and explode your list building, you need to first complete a few other steps. Below are seven tips you should consider before you start building your list.

  1. Pick Your Niche

Unless you already have a niche that you’re interested in and know will work, you can’t skip this step. On the other hand if you’re lucky enough to already have a niche you know will work, then feel free to skip on down to Step 2.

Don’t worry, you’re probably like most people and have no idea what niche you want to get into when starting out online. Just realize that you’re going to have to do some research into what’s being sold and more importantly into what’s being purchased online.

First and foremost you don’t want to pick a niche that’s too competitive or has to few buyers. Either of those will certainly make your millionaire success journey that much more difficult. However, you do want a good level of competition, because that will probably mean there is a good level of buyers as well.

So where do you start?

How about heading over to the Clickbank Marketplace. Note: if you don’t have a Clickbank account, you’ll need to create one… don’t worry, it doesn’t cost anything to create an account. Once you log into Clickbank you will want to review their “Categories” or niches like “Arts & Entertainment, Business / Investing, Education, Games, etc.”

These categories often have subcategories that break things down into even more detailed segments. As you go through each category or subcategory use the “Sort results by” feature to sort by “Gravity” and make sure you also select the “High to Low” option. The higher the gravity the better the sales, so you’ll want to look for products that interest you and have a high gravity.

If nothing strikes your fancy on Clickbank, then head over and checkout the Top Products on eBay. Not only will this show you the Best Selling Products, you’ll also be able to see Trending and New products as well. You can also explore eBay’s Trending Collections or just select the “Shop by category” dropdown and go through the multitude of categories until you find something that interest you.

Last of all, but of course not least, you can head on over and checkout the Amazon Best Sellers list. Not only is the list broken down by category making it relatively easy for you to go through and see what item are most popular, it’s also updated hourly which means you can go crazy trying to keep up with all the changes. Just kidding… don’t constantly check their listings to see what’s on top, just search through it for some ideas of what might interest you enough to make you want to promote it.

  1. Determine Your Product

This will come easy, if you’ve already gone through Step 1. As you went through Clickbank, eBay, and Amazon as recommend above to get ideas about which niche to promote, you were probably also looking at what products were most popular. Hopefully you did and kept notes about which products you thought were worth promoting.

If you didn’t keep notes on products while determining which niche you want to market in or you skipped Step 1, because you already knew what niche you were going to market in, don’t worry because you’ll have your chance now to determine your product.

Now that you know your niche, lets log back into the Clickbank Marketplace and pick a product. Once in Clickbank go to the niche, category, you’ve picked and use the “Sort results by” feature to sort by “Gravity” and make sure you also select the “High to Low” option. You want to look at and review products that have a high gravity, because those are the ones that are selling well.

However, you need to remember that gravity is just a good starting point. Don’t forget to put yourself into the mindset of the customer you’re going to be marketing this product to. Click through to the product authors landing page and ask yourself, “Would I buy this product if I’m into this niche?”

Look for product authors whose landing pages come with videos, great sales copy, and buyer testimonials. Those are the ones you’re going to want to promote. Stay away from the ones that have cheesy ad copy, even if they have high gravity. Gravity can change quickly once people are no longer making money.

  1. Marketing Your Product

If you’re lucky, the Clickbank product you picked will have come with an autoresponder email series already written for you and ready to use in the marketing of your product. And if it didn’t, then you’re going to have to do some more research into the features and benefits of your newly found product so you can market it to your client base.

At a minimum you’re going to want to come up with at least 5 emails to use in the marketing of your product, and probably no more than 10. It’s not uncommon for people to have to see and hear about something on average 5-7 times before they make a buying decision. Less than that and they probably won’t have enough time to convince themselves that they need it, while more than that and they’ll think you’re annoying them.

Your autoresponder series should cover the benefits of the product, include testimonies when possible from previous (happy) buyers of the product, and each subsequent email should add a little something different that the previous emails didn’t include. Once again, if you picked a really good product on Clickbank it will already have product-marketing emails written for you. And if it doesn’t you should be able to pull content for your emails from the product sales page that came with the product.

  1. Create Your Landing Page

Speaking of product sales pages, the really good products on Clickbank will come with a complete sales page, also known as, a squeeze or landing page. And if it doesn’t, then there probably wasn’t an autoresponder series either and you might just want to rethink using this product… especially if this is the first product you’re trying to market. Creating everything on your own the first time you do this, is a little too much to ask for.

The main goal of your landing page is to capture leads, at a minimum the email address of the visitor to your page. If you don’t turn the lead into a subscriber, it’s going to be pretty hard to sell them your current and future product offerings. What’s the best way to turn a lead into a subscriber? Well it’s usually through a free offer or “ethical bribe.”

Ethical bribes can range from great tips that you send to your subscribers in the autoresponder emails you created, to an eBook or PDF report, a video, or some other valuable product that your lead would want in exchange for giving you their email address. Just remember, the more value you give away the more likely it is that you will gain a subscriber.

There are few key items you need to include on your landing page to help sell your offer. The first is a powerful headline. Your headline should be at the top of your landing page, be in big bold text, and include the most important benefit your product has to offer. A great headline will sell your lead and get them signing up all on its own.

The second item every landing page needs is a “Call to Action” indicator. Don’t take for granted that your lead will actually do what you ask them to do. You must tell your lead exactly what they need to do. Yes you TELL them what to do. Also, your call to action may appear in a few different formats. You can include some text like “Enter your Name & Email below” or a button that reads “Click to Get Your Free Report Now” or some graphic arrows that point to the button you want the lead to click. Whatever you do, don’t be “wishy washy.” Make sure you tell your lead exactly what to do.

And the last item all good landing pages need is the capture form. This will be where the lead enters their email and any other information you want to collect. Typically your call to action text will be just above your capture form, your forms submit button will include additional text that tells your leads what to do, and if you’ve designed your landing page correctly your capture form will appear “above the fold.” An “above the fold” capture form is one that appears and is viewable to the lead when the landing page is first displayed on the leads device (e.g. computer, tablet, phone, etc.) and doesn’t require the lead to scroll down to see the capture form.

  1. Getting Your Traffic

You’re now to the point where everything is in place to sell your product and the only thing you need now is traffic, because once you get traffic your landing page will capture your leads, and your autoresponder series will sell your product. Or that’s what suppose to happen, if all goes according to plan.

Now don’t be surprised if only 1 out of 10 or even 1 out of 100 leads actually becomes a subscriber. Not everyone coming to your landing page is going to want what you have to offer, but also realize that once you turn on the traffic “faucet” that it’s on 24 hours a day, 7 days a week, 365 days a year.

Also, remember that things on the Internet aren’t static. If you’re getting traffic and few subscribers, then make some slight changes to your landing page. Adjust your headline or alter your call to action, modify your capture form or even switch out the free gift you’re using as your ethical bribe.

As to where you should get your traffic from, that’s the magic question everyone is looking to get answered. Depending on your niche and how competitive it is your traffic may come from search engines like Google, Yahoo, and Bing. Or maybe you can get traffic from social media sites like Facebook and Twitter. Video marketing on sites like YouTube is another great way to get traffic. And there are plenty of article sites on the web where you can distribute articles you write and include links pointing back to your lead capture page.

Note the one thing all those previous traffic methods have in common is that they generate free traffic, which is great but it’s not always easy to generate large volumes of leads via free traffic when you’re starting out. So if free traffic methods aren’t generating enough leads for you, then you may have to result to paid traffic methods. Paid methods includes things like Pay Per Click (PPC) advertising (think Google Adwords and Microsoft Adcenter), Ad Swaps, Solo Ads, Social Media Ads (Facebook Display ads, LinkedIn Ads, promoted Tweets), Affiliate Programs, and Paid Listings just to name a few.

Regardless of how you get your traffic the goal is to convert leads into subscribers, so you can convert subscribers into buyers.

  1. Selling Your Secondary Products

Now don’t think you’re all done after you make that first sale to your new subscriber, unless of course your plan is to always get new subscribers. Well even if that is your plan, and it should be, you don’t want to rely on just one sale only per subscriber.

You should realize that as your list continues to grow, you have unlimited built-in (free) traffic at the push of a button. Setup a new landing page, write an email offer, and blast it out to your list. Nothing is better than a list of “targeted” subscribers that know and trust you, and are willing to buy from you again and again and again.

Just make sure you keep a good balance between selling and giving, and that your secondary products go hand-in-hand with or are complementary to the original product you sold. Treat your list well and they will treat you well too!

  1. Stop, Drop and Roll

In most instances when you “catch fire” you’ll want to “stop, drop and roll.” Unfortunately this is not one of those instances. Once your Internet marketing activities catch fire you’re going to want to repeat, repeat, repeat!

Just remember that getting things up and running takes time and can get frustrating, but once you make your first sale it feels oh so good. And after you’ve done it once, all you need to do are the same 7 Steps over and over and over again. Nothing new. Nothing different. Keep testing and refining your actions and before you know it you’ll develop your own strategies and in no time you’ll be a pro.

As always, here’s to your success!

Gaming Google: Private Blog Networks – The Latest Google Slap

Gaming Google

Unless you were living under a rock this week or off exploring galaxies far far away, you probably heard about the Google crackdown on the concept of Private Blog Networks (PBN’s). It appears that the crackdown started on September 18th via Google Webmaster Tools (GWT) manual action notices.

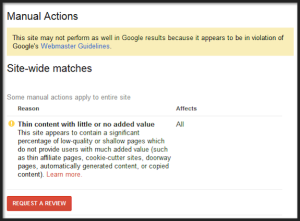
As Webmasters around the world logged into GWT that morning, they were greeted with manual action notices from Google informing them that their sites had “thin content” – shallow pages which do not provide users with much added value – also know as spam. Below is a screen shot of the message Spencer Haws, over at Niche Pursuits, received.

Gaming Google Webmaster Manual Action Notice

In fact, Spencer wrote a really interesting article “Alright Google, You Win…I’ll Never Use Private Blog Networks Again!” about his own experience with his latest Google Slap that’s worth a read.

Gaming Google

Again, unless you’re still living under that rock, you would know that Google considers thin content to be search spam and has a page in their Webmaster Guidelines explaining they can take action against this type of content.

As we saw in the example above a number of SEOs and Webmasters who have used PBNs to artificially inflate their Google rankings got “Google Slapped” with these manual actions.

Now we’re not hear to debate whether “Black Hat SEO” techniques are good or bad or if PBN’s fall under the black hat category, but apparently in this round of Google punishment and site slapping the holders of the keys to the kingdom have decided that PBN’s are on the bad side of the equation and that some sites needed to be de-indexed.

Since there can be only one site at the top of the totem pole there will always be those how try to Game Google and their ranking algorithm in an effort to have their site at the top spot. Of course, since Google controls the algorithm, they can pretty much do what they want in their attempt to provide what they feel are the “best” results for a search request that a user of their system performs.

Every time Google changes their algorithm there will be an endless debate about how unfair it was and how site rankings dropped. Nobody says you have to use Google to get traffic or even have your site indexed by them, so if you don’t like their rules then go get ranked on some other search engine and don’t complain.

Content at the End of the Rainbow

When all is said and done what “content at the end of the rainbow search” are people really looking for? Well, the answer to this question is probably one of those “it depends” type of answers. In some instances users are probably fine with thin content. A simple question or topic can often be answered in simple terms that don’t need 1200 words or some arbitrary amount of text to convey a perfectly sound answer.

On the other hand, there are times were page after page of content is needed to thoroughly explain a topic. Either way, as long as the “searcher” is happy with the end result the size of the content shouldn’t matter, right?

Recommended Action

Unfortunately, when your site violates one of Google’s recommended guidelines you’re usually left somewhat in the dark. It would be nice if they told you exactly what was wrong, but they don’t. Maybe they fear that if they did, folks would gain too much insight into how their algorithm works.

Oh well, in this case a  quick read of the Google Support page for a recommended action related to thin content will tell you review the following sections of their Webmaster Guidelines:

Of course after you do that and check for duplicate content on your site, thin content, etc. etc. and you’re sure your site is no longer is in violation of Google guidelines, you can request reconsideration of your site. And then you sit back, cross your fingers, and hope after your site is reviewed that Google agrees with you and determines that your site no longer violates their guidelines. If they do agree with you, they’ll revoke the manual action and hopefully you’re site will once again rank and you’ll climb back to the top spot on the totem pole.

The Risk of Gaming Google

Just like everything else in life, there are those who make the rules and those who have to follow them. Those who don’t want to follow the rules will do anything they can to get their way and when the rule makers catch them, they usually whine and cry and try to blame everyone else rather than accept responsibility for what they did.

Did you think that SEO and ranking on Google was any different than any other rule based systems we have to follow? Nope. It really doesn’t matter if it’s PBN’s, Link Wheels, Black Hat SEO or any other method you use to get your site ranked on Google. If Google doesn’t like it, then you risk having months or years worth of work and money go down the drain. Trying to game Google and circumvent their rules for ranking will always be a game of cat and mouse.

Going Forward to Game or Not to Game Google

At the end of the day there’s really only one question you need to ask if you’re going to game Google and that’s “Can you make a profit before they catch you?” It really is that simple, well that is if you are just looking to make a quick buck and then move on to something else. If you’re going this route, then you’re probably not creating a long-term business anyway.

However, if you’re looking to create a long-term business, you may want to think twice before you try and game the rule makers. Instead you may just want to adapt and evolve, because when it comes to ranking your site you need to realize what works today my not work tomorrow anyway. Besides you really are at the mercy of Google to some degree anyway. It’s their algorithm and they make hundreds of changes to it each year, and that’s in addition to all those animal updates like Panda and Penguin they make too.

Instead of just trying to game Google and get quick results, you might just want to create good solid content that really does interest the people you’re trying to reach and then reach those people. Once you reach a few people, if the content is good enough, they will probably start to share it and your network reach will grow. As your network grows and you turn out more content, it won’t be long before even more people will be talking about your website.

Going forward we just don’t recommend you game Google, especially with your money site, the one you plan to have for a long time and be your business. If you do, Google will eventually catch you and your site may just fall off the face of the earth when it comes to ranking and being found by those who are looking for what you have to offer.

Of course we’re not naive and we know plenty of individuals will continue trying to game Google and do things to rank their sites fast, but in the long term we’re fairly certain those sites will not achieve the true potential that they could achieve.

And for those who are willing to put in the time and effort to get their site to rank based on the rules that Google set forth, we’re fairly certain that they will rank well regardless of how many algorithm changes Google makes. So stop trying to game Google, think twice about Private Blog Networks, and do your best to stay away from the latest Google Slap.

Your Long Term Business Vision

Besides Google is just like any other business, here today and possibly gone tomorrow.  OK maybe not tomorrow, but maybe one day. You don’t want to put all your eggs in one basket, such that your business depends only on traffic from Google to survive. Build your business with Google and also without it.

Create content and solutions for your audience that they want to see. Treat your business like a real business. Determine what your long term business vision is and then go out and make it happen.

As always, here’s to your success!
Creating Social Media Visual Content That Gets Results

Webinar Review: Creating Social Media Visual Content

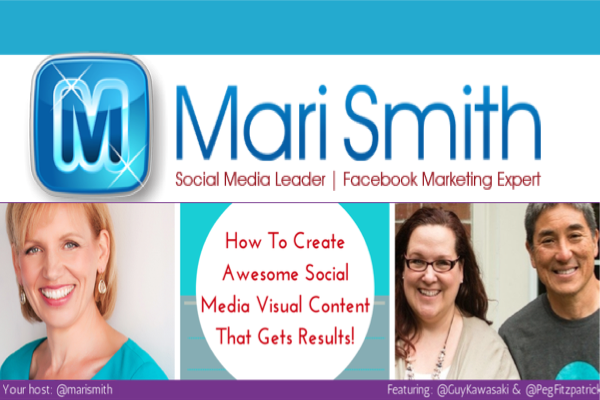
As Mari said “Woohoo, what a fabulous webinar we had today!”

On Monday, June 9th 2014, Mari Smith hosted a webinar with Guy Kawasaki and Peg Fitzpatrick. both from Canva, in which they shared the tactics and best practices for crafting the perfect, most effective social media posts including:

  • How to create perfect social media posts for each of your channels
  • Which types of posts attract the most shares, comments, and search engine rankings,
  • How to increase your following with the right combination of standout social media  posts + enchanting engagement!

And for those of you who missed it, here’s a quick recap of the “How to Create Awesome Social Media Visual Content That Gets Results” webinar.

The Art Of The Perfect Post

First and foremost visual content is the way to go in social media. In fact, social media is now all about creating eye catching visual content that makes the viewer to want to share the content, not only with all their friends and followers, but also inspires them to take action; to sign-up for your list and to become a follower of your brand.

Remember that social media is a marketing platform for your brand. Take it seriously and your brand can soar above your competition. With that in mind here are 10 Key Points of the Perfect Post as recommend by Guy and Peg.

Key Point #1: Pass the re-share test

Probably the most important philosophical point to consider when creating your social media post is “Will it pass the re-share test?” Are you sending something out that is so interesting, informative, entertaining, that others will share your content. If your posting achieves just this one key point, you’ve probably cover 90% of what needs to be done when writing a post.

Key Point #2: What makes something pass the re-share test

Be Valuable. But what or who determines value in a post? It’s certainly not you! You need to send stuff out that is: Informational (what just happened), Analysis (what does it mean that this happened), Assistance (how to avoid a bad thing or have a good thing), or Entertainment (is this just funny stuff).

Key Point #3: Be bold

All this means is that you should feel “free” to express “your opinions!” Express your thoughts, regardless of the topic and do not be worried about negative comments. You’ll get them and you’ll also get plenty of positive comments too. So take a stand and be bold.

Key Point #4: Be brief

These are guidelines: Fifty Character headline, Three-sentence body, Active Voice. Social media is NOT a replacement for blogging. Your blog, like this one, can share valuable information that is rather lengthy. The key to social media is K.I.S.S… and we know what that means (Keep It Short Silly). Make it brief with eye-catching photo’s and you’re golden.

Key Point #5: Credit your source

Always, always, always credit your source. When you find great content form someone else just give them credit. When people see you sharing their post, it helps you establish a relationship with them and it fosters better engagement. And as Guy says “It’s good karma.”

Key Point #6: Add drama

Add a photo or image that helps tell your visual story and create more activity on each of your post. Text only isn’t going to grab attention on every platform. And if you’re re-posting / sharing something that doesn’t have an image, then create one or find one you can use that helps sell the story. By the way, size matters a lot in social media. You’ll want to use properly sized images per the platform your posting to. Here are Peg’s recommendations, in pixels of course: Instagram (640×640), Pinterest (735×1100), Facebook (940×788), Google+ (800×600), and Twitter (1024×512).

Key Point #7: Embrace hashtags – #

These have become extremely important in social media. The reason to use them is it ties content together. Typically when you click on the # tag it gives you a listing of all the posts that relate to that topic, so it’s a great way to connect all of your content with related content created by other people. By the way, don’t forget to “check” your # tag before using it or you could pick one that’s already being used for other (possibly inappropriate) content or totally unrelated to your target audience.

Key Point #8: Schedule and spread out

You want to trickle your content out at a steady pace. Don’t send out a bunch of tweets or post over a half hour or so. Find a scheduling tool that works with your service, if the service you’re using doesn’t have one, and schedule your content to go out at different parts of the day and days of the week.

Key Point #9: Keep calm and post often

You need to be consistent on social media. Being consistent helps people know that you’re a resource they can count on and use. Especially when new features or problems arise in your niche, you want people to be able to visit your site and find content and discussions taking place about the subject at hand that allow them to find the answers they’re looking for. In addition, frequent posting helps build your brand and (as long as it’s not thin or spammy) Google loves sites with lots of content.

Key Point #10: Cross-post

Share your content far and wide. If you have something you want people to see, you have to get it out in-front of them which might mean sharing it on multiple social media platforms. And you might want to consider not sharing exactly the same thing at the same time across each of the networks you’re a part of. Spread it out and format it differently on each network; it doesn’t have to be drastically different, just different enough and with any specific features the individual network requires.

Bonus Point: Check with an “incognito” page

Known as incognito in the the Chrome browser, while other browsers call this private browsing, this allows you to see what other people see when they visit your social media post or profiles. When activated its as if you are not signed into any services, so some features within a service won’t track your viewing habits and thereby show a profile owner that you were stalking them. BTW… it doesn’t necessarily hide things from your service provider or employer, so don’t think you’re following everyone.

Well there you have it. Guy Kawasaki and Peg Fitzpatrick have shared with Mari Smith every thing you need to know in order to create social media visual content that gets results. But wait, that’s not all.

Services and More

After sharing all these great tips on the art of the perfect post, Guy and Peg shared some additional information about tools / services that make their social media content creation that much easier. They also listed some sites that have great content that you can add to your sharing process.

Since Guy and Peg are Canva employees, they offered a special deal to everyone which you can also access even though you couldn’t watch the webinear live. They encouraged everyone to tryout Canva, an online graphics tool that you can use to design really great images for social medial and more. There are plenty of designs available for you to use, for a small fee, and plenty more that are free or you can upload your own items.

And to wrap things up they gave a quick demo of Canva. Oh… and as great live demos go, Guy dropped himself from the Google Hangout… oops! It didn’t take him long to reconnect, but Peg did the demo just to make sure we could see it :o)

Replay Info

Thankfully Mari understands that not all of us can join a live webinar due to other commitments and timezone differences. So, as promised, she recorded the entire event and here’s the replay link.

(If the above link doesn’t work for you, you can watch the replay video directly on YouTube.)

Plus, the slides from the presentation can be accessed via Guy’s SlideShare account.

Now set aside some time, specifically 1:01:29;29, and watch this video so you can learn even more about Creating Social Media Visual Content That Gets Results and The Art of the Perfect Post.

Apple Touch Icon Customize Your Website For Apple Products

iPhone Screen Shot Apple Touch Icon

There are plenty of Apple mobile device users out there, so why not take an extra minute or two and add a little known customization to your website in the form of an Apple Touch Icon and make those visitors fell special. If you manage your website, this really is easier than it looks and it’s a customization that will make you standout above your competition.

What is an Apple Touch Icon?

Apple touch icons are basically favicons for Apple mobile devices and when set in your HTML it will be displayed when a user saves your web page to their home screen on any of their Apple mobile (iPad, iPhone, and iPod) devices.

Unfortunately Apple didn’t just use the already defined favicon standard and instead created their own short code to do this, thus you have to do a little work to setup this special icon. However, setting the Apple Touch Icon is relatively easy and a good idea, because by default iOS just saves a small thumbnail of your website as the application icon on a mobile device. These default thumbnails are often hard to identify and generally don’t look all that great.

Creating an Apple Touch Icon

To create an Apple touch icon you don’t have to be a professional graphic designer. As long as you have a good quality image that scales well and access to some simple image editing tools, you’ll be just fine. On the other hand, if you don’t already have an image that scales well or any image editing tools, then just hire a graphic designer to create your icon for you.

Begin by creating a square .png formatted graphic that is sized to 152 by 152 pixels. A 152-pixel image is the perfect size for the Apple iPad and will allow other Apple devices to properly resize the icon as needed. Although you can create individual icons specific to each of the Apple Mobile Device Types, we’ve found that creating one icon sized for the iPad works just fine. NOTE: if you love getting down and dirty and knowing all the little details about coding, checkout the iOS Human Interface Guidelines: Icon and Image Sizes or Safari Web Content Guide: Configuring Web Application articles.

By the way, when creating your icon, don’t worry about adding fancy rounded corners or glowing effects. Although some of these features were once key characteristics of Apple icons, some have since been deprecated and the device will automatically add those features that are still supported.

Implementing Your Apple Touch Icon

Implementing your Apple Touch Icon is very easy to do and requires one simple line of HTML code, unless of course you create individual touch icons for each device type. In that case you’ll need to add one line of HTML code for each of the images you create for the different devices; one more reason we use just one image for all device types.

<LINK REL=”apple-touch-icon” HREF=”http://your-dowmain.com/directory-path-to-image/apple-touch-icon.png” />

Make sure you upload your Apple Touch Icon to your web server and if you name your image file “apple-touch-icon.png” the only changes you need to make to the above line of code are to replace “your-domain.com” with your domain name and “directory-path-to-image” with the directory path to your touch icon.

Testing Your Apple Touch Icon

Once you’ve created your Apple Touch Icon, uploaded the image to your website, and made the appropriate HTML code edits you’re readying to test your handy work. Grab your favorite Apple mobile device, launch Safari, and visit your website. After your website loads press the AirDrop icon (looks like a box with an arrow pointing out the top of it) at the bottom of Safari. AirDrop will open and you should see a scrolling list of icons in the bottom portion of the display; press the “Add to Home Screen” icon and that’s it.

If all goes well you should see your customized Apple Touch Icon displayed on your mobile device; it will probably be the last icon on the last page of icons on your device. Below is how our Millionaire Success Network Apple Touch Icon looks on an iPhone. Oh… it looks the same on an iPad too!

iPhone Screen Shot Apple Touch Icon Preview

That’s it, simple and quick!

PS – this should work for your Android mobile devices visitors as well, with no other changes required. And if you have any problems getting the above code to work, try moving your Apple Touch Icon to the root directory of your web server and adjusting the image path accordingly.

Although this isn’t the same as having a dedicated iOS application, it does provide a better mobile user experience for visitors who routinely access your website from their mobile devices. More importantly it gives you complete control of how your brand is displayed to mobile users that bookmark your site to their home screen.

Being able to control every aspect of your brand and how it’s presented to your customers is priceless, so take an extra minute or two and add that Apple Touch Icon to your websites HTML code and take control of your branding today.